Tomato Chutney – Tangy, Spicy & Flavor-Packed Homemade Condiment

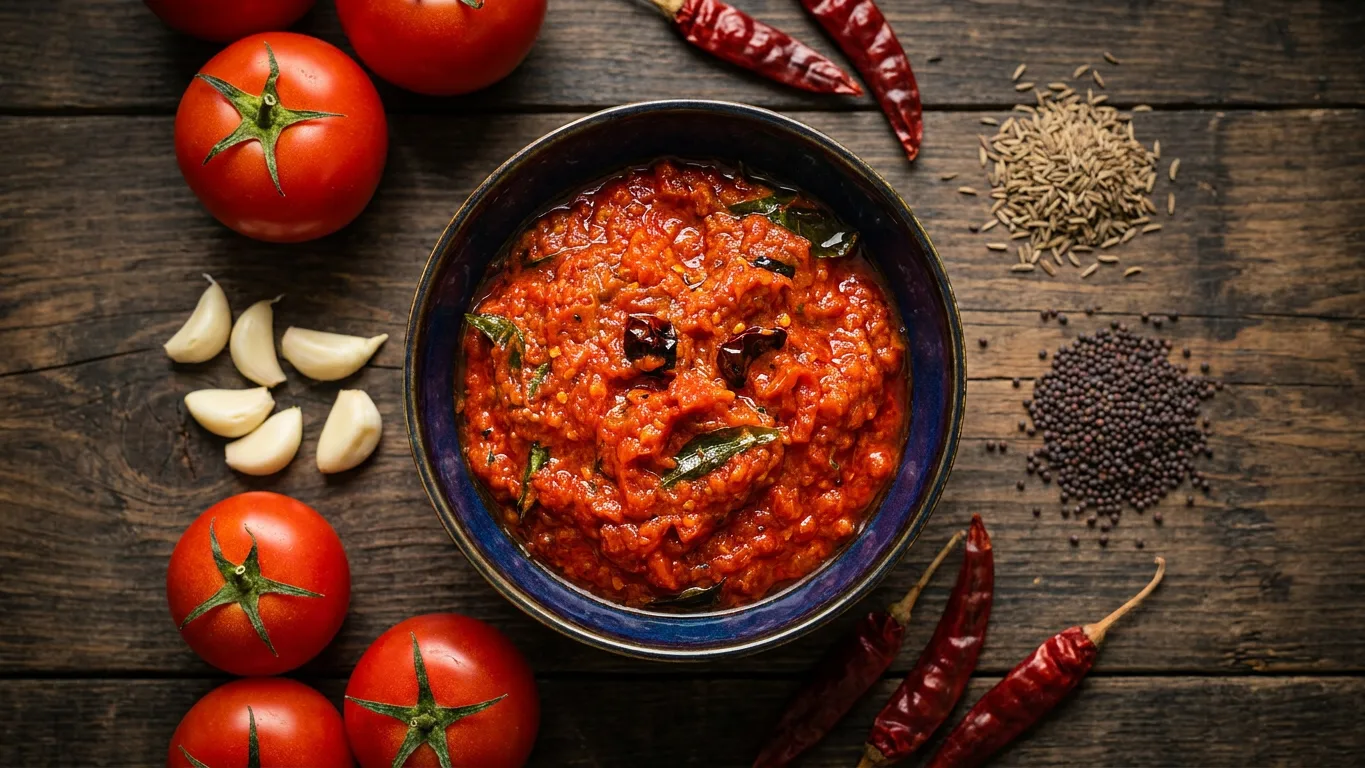
This homemade Tomato Chutney is a simple yet incredibly flavorful condiment made with ripe tomatoes, mustard oil, garlic, and a fragrant blend of traditional tarka spices. Cooked until rich and thick, it delivers the perfect balance of tanginess, warmth, and spice in every bite.

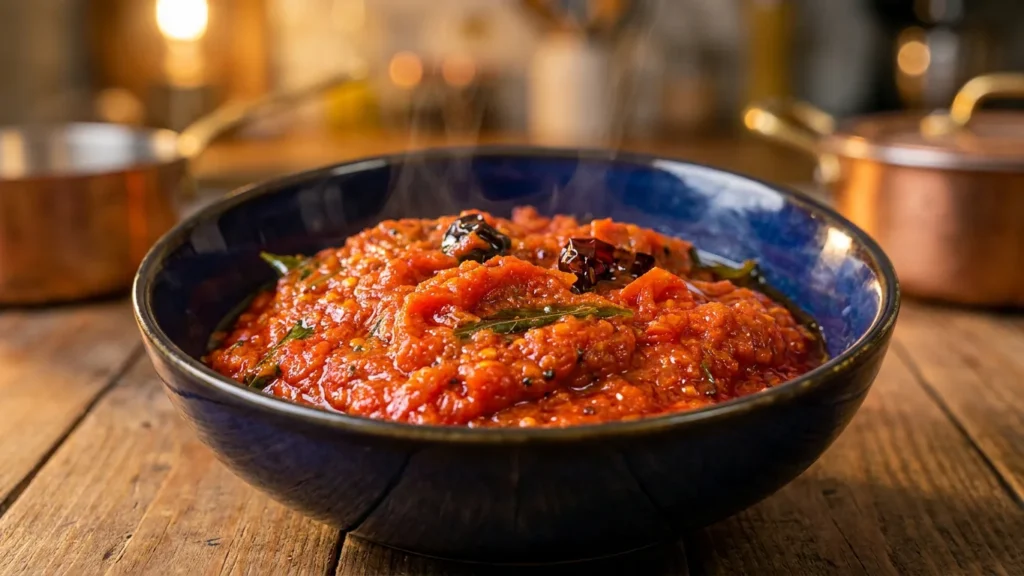
What makes this chutney special is the combination of aromatic whole spices, curry leaves, and garlic tempered in mustard oil, which gives it a distinctive depth of flavor. The tomatoes are first pressure cooked in Ninja Foodi and strained to create a smooth texture, then cooked down through a proper bhunai process until the oil separates, resulting in a chutney that is both rich and intensely satisfying.

Whether served alongside chapati, paratha, rice dishes, or simply spread over a slice of bread, this versatile tomato chutney adds a burst of flavor to any meal. It’s an easy recipe that transforms everyday ingredients into a delicious accompaniment you’ll want to keep on hand.

Tomato Chutney – Tangy, Spicy & Flavor-Packed Homemade Condiment

A flavorful homemade tomato chutney prepared with mustard oil, garlic, traditional tarka spices, and a touch of lemon juice. Perfect with chapati, paratha, rice, or as a spread on bread.
Prep Time 10 minutes
pressure cooker time 20 minutes
Total Time 30 minutes
Course Side Dish
Cuisine Pakistani
Servings 12

Equipment

  • Ninja Foodi

Ingredients
  

For the Chutney Base

  • 1500 g tomatoes
  • 1 tsp red chili powder
  • 1 tsp salt
  • 135 g tomato paste
  • 2 tbsp lemon juice optional

For the Tarka

  • 1/2 cup mustard oil
  • 1 garlic clove for neutralizing oil smell
  • 1/2 tsp cumin seeds
  • 1/2 tsp fenugreek seeds
  • 1/2 tsp nigella seeds
  • 1/2 tsp mustard seeds
  • 5-6 garlic cloves thinly sliced
  • 15-20 curry leaves
  • 5-6 dried whole round red chilies
  • 4-5 garlic cloves

Instructions
 

Pressure Cook

  • Pressure cook tomatoes and 4-5 garlic cloves on high for 20 minutes. Do not add water; the tomatoes will release their own moisture.
  • Pressure Cook at High for 20 minutes and release the pressure Naturally
  • Allow the tomatoes to cool slightly, then remove and discard the skins.
  • Strain the cooked tomatoes and reserve the liquid. The liquid is not needed for this recipe. You should get approximately 3 cups, which can be used for cooking rice or pasta.
  • Pressure Cook on High for 20 minutes then release the pressure Naturally

For the Tarka

  • Heat mustard oil in a pan. Add 1 whole garlic clove and let it sizzle. This helps neutralize the strong smell of mustard oil and indicates the oil is ready for the tarka spices.
  • Remove the whole garlic clove. Add the thinly sliced garlic and fry while stirring constantly until fragrant and lightly golden.
  • Add cumin seeds, fenugreek seeds, nigella seeds, mustard seeds, curry leaves, and dried whole red chilies. Stir continuously until aromatic. Do not burn the spices. Remove the tarka from the pan immediately to stop further cooking.

Preparing the Base for the Chutney :

  • Add the tomatoes and whole garlic cloves to the Ninja Foodi inner pot
  • No water needed tomatoes will release their own moisture, close the pressure lid and pressure cook until softened.
  • Add the strained tomato pulp, tomato paste, lemon juice (if using), and the prepared tarka oil. Mix well.
  • Mash any remaining tomato chunks while frying.
  • Add salt and red chili powder. Continue frying (bhunai) until the oil separates from the chutney.
  • Serve warm or at room temperature.

Notes

Serve this tomato chutney as a spread, or condiment alongside parathas, chapati, dosa, idli, grilled meats, sandwiches, or rice dishes. It can also be used as a flavorful accompaniment to breakfast items.
Don’t discard the strained tomato liquid. Reserve it and use it to cook rice, pasta, soups, or curries for extra flavor.
Remove the tomato skins for a smoother chutney texture.
 
Keyword chatni, Instant Pot Tomato Chutney, Ninja Foodi Tomato Chutney, raita, tomato chatni

Creamy Beetroot Dip with Cranberries & Walnuts

The deep vibrant color of beetroot transforms this dip into something that feels both striking and comforting at the same time. Blended with yogurt, and simple seasonings, this creamy beetroot dip brings together earthy sweetness, freshness, and gentle tanginess in a beautifully balanced way.

Its smooth texture and naturally bold color make it stand out on the table, while the yogurt keeps the flavor light and refreshing. Every spoonful carries a balance of creamy richness and earthy depth without feeling heavy, making it easy to pair with breads, grilled dishes, roasted vegetables, or simple snacks.

Dips like this show how everyday ingredients can become elegant with only a few thoughtful additions. Served chilled, the dip feels refreshing, colorful, and full of character — the kind of dish that quietly becomes the center of attention on the table.

Creamy Beetroot Dip with Cranberries & Walnuts

Prep Time 4 minutes
Pressure cook 8 minutes
Total Time 12 minutes
Course Side Dish
Cuisine Mediterranean
Servings 4

Equipment

  • 1 Instant Pot
  • 1 Mixing bowl
  • 1 Spatula
  • 1 Electric blender

Ingredients
  

  • 3 Beetroot small
  • 2 cups Yogurt
  • ¾ tsp Salt
  • ¾ tsp Cumin seeds Dry roasted and crushed
  • 2 tbsp Cranberries Chopped
  • 2 tbsp Walnuts Dry roasted and chopped

Instructions
 

  • Place the trivet in the inner pot of the Instant Pot
  • Pour ½ cup water into the pot
  • Place the beetroots on the trivet
  • Pressure on High for 8 minutes
  • Quick release the pressure
  • Remove the beetroots from the pot and let them cool
  • Blend into a smooth puree
  • Whisk the yogurt until smooth
  • Add 3-4 tbsp beetroot puree
  • Mix well
  • Add salt and cumin seeds
  • Add cranberries and walnuts
  • Mix well
  • Serve chilled as a dip, spread, part of mezze platter or enjoy on its own

Creamy Hummus with Garlic Chili Oil

Hummus is one of those timeless dishes that beautifully combines simplicity, nourishment, and bold flavor using only a few wholesome ingredients. Made with chickpeas, tahini, garlic, lemon, and olive oil, hummus continues to remain a staple across many Middle Eastern tables because of its smooth texture, rich flavor, and incredible versatility.

This version is blended until extra creamy and finished with warm garlic chili oil for added depth, aroma, and richness. The balance between the nutty tahini, fresh lemon, savory garlic, and silky olive oil creates a dip that feels both comforting and deeply satisfying.

Whether served as part of a mezze spread, enjoyed with warm bread, paired with grilled dishes, or used as a nourishing snack, hummus continues to remain one of the most appreciated examples of how simple ingredients can create something both elegant and flavorful.

Creamy Hummus with Garlic Chili Oil – Middle Eastern Desi-fusion

A smooth and creamy homemade hummus made with chickpeas, tahini, olive oil, and salt, then topped with fragrant garlic chili oil for an extra layer of flavor. Perfect as a dip, spread, or part of a mezze platter.
Prep Time 5 minutes
Cook Time 5 minutes
Total Time 10 minutes
Course Appetizer
Cuisine Middle Eastern-Desi Fusion
Servings 5

Equipment

  • Food Processor or Blender

Ingredients
  

Hummus (Base Ingredients)

  • 2 cups 400 g boiled chickpeas
  • 130 g tahini
  • 1/4 cup olive oil
  • 1/3 cup water adjust as needed
  • 1 tsp salt

Tarka (Garlic Chili Oil)

  • 2-3 tbsp olive oil
  • 3-4 garlic cloves thinly sliced
  • 1 tsp chili flakes

Instructions
 

Hummus (Base Preparation)

  • Add boiled chickpeas, tahini, olive oil, water, and salt to a food processor.
  • Blend until smooth and creamy. Add more water if needed to reach your desired consistency.
  • Transfer the hummus to a serving bowl.

Tarka (Garlic Chili Oil)

  • Heat olive oil in a small pan.
  • Add the sliced garlic and fry until golden and fragrant.
  • Remove the pan from the heat.
  • Add the chili flakes and stir immediately.
  • Pour the garlic chili oil over the hummus.
  • Serve immediately.

Notes

Adjust the amount of water to achieve your preferred consistency.
Adding the chili flakes after removing the oil from the heat helps prevent them from burning.
Serve with pita bread, fresh vegetables, crackers, or as part of a mezze platter.
Keyword chickpea dip, creamy hummus, homemade hummus, hummus recipe
Privacy Overview

This website uses cookies to provide you with the best possible user experience. Cookie information is stored by your browser and performs functions such as recognizing you when you return to our website, as well as helping our team understand which parts of the website are most interesting and useful to you.