Fresh Basil Pesto Pasta with Pine-nuts and Walnuts

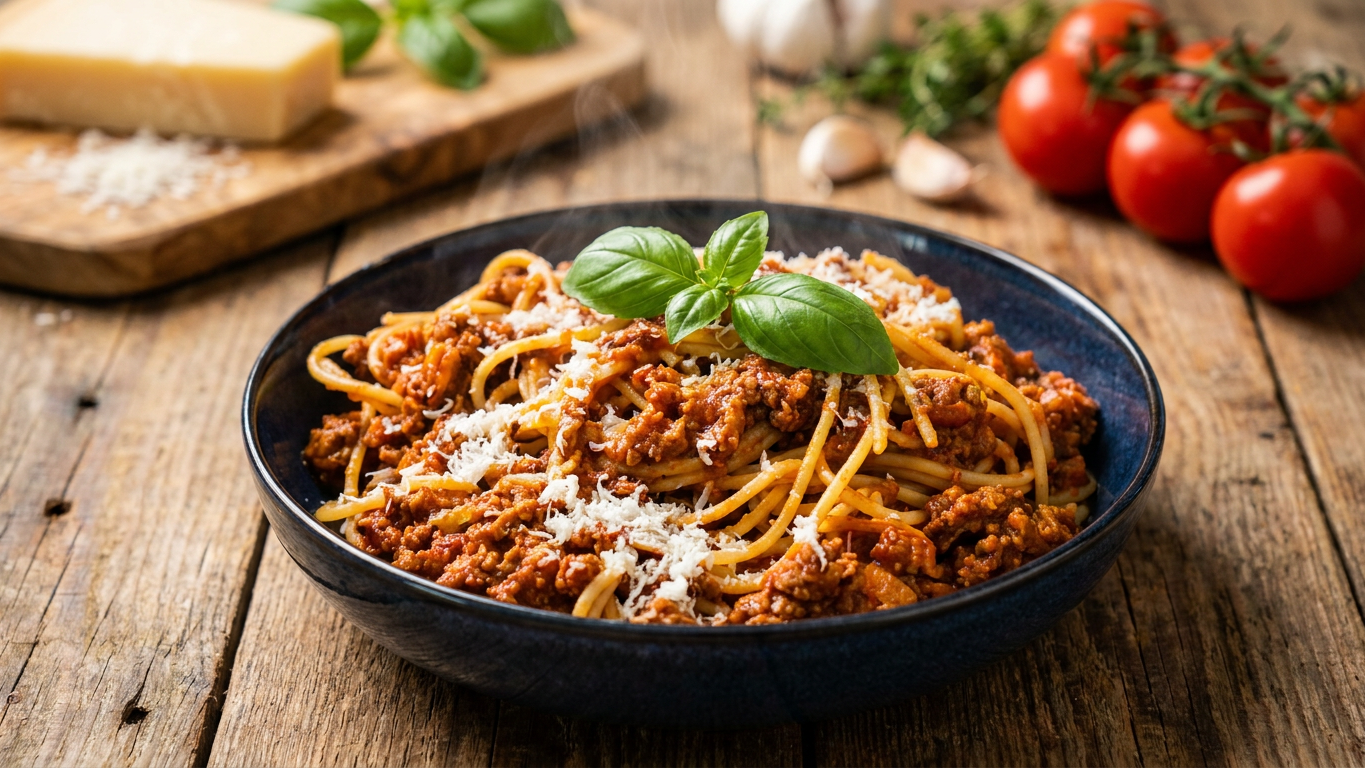
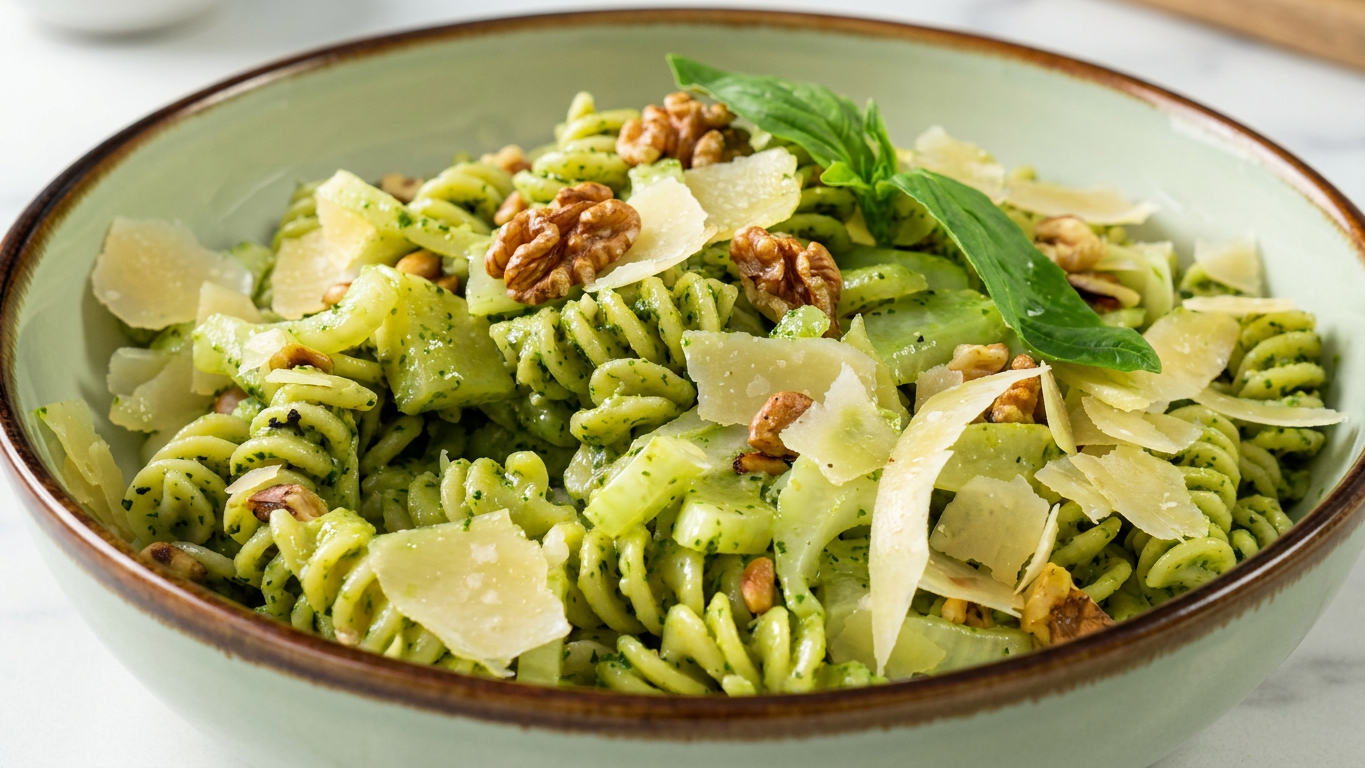
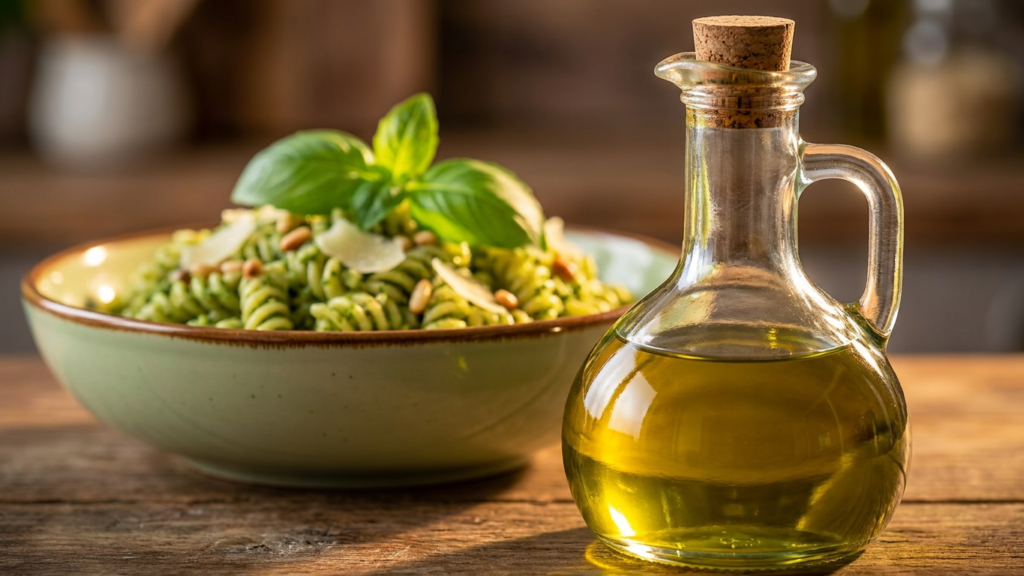
The aroma of fresh basil, garlic, parmesan, and olive oil gives pesto pasta a freshness that feels vibrant from the very first bite. Unlike heavier cream-based pasta dishes, pesto pasta carries a lighter richness where herbs, cheese, and olive oil remain the center of the flavor.

The sauce clings gently to the pasta, coating every bite with the nutty depth of parmesan, the freshness of basil, and the warmth of garlic. Small additions such as lemon juice help brighten the flavor even further while keeping the vibrant green color of the pesto beautifully fresh.

Pesto pasta is one of those dishes that feels both comforting and refreshing at the same time. Quick to prepare yet full of layered flavor, it turns a handful of simple ingredients into a meal that feels elegant, aromatic, and deeply satisfying without becoming overly heavy.

Fresh Basil Pesto Pasta with Pine-nuts and Walnuts

A rich and aromatic pasta made with fresh basil pesto, fennel, toasted nuts, parmesan cheese, and a creamy olive oil blend. Perfect for a quick gourmet-style meal.
Prep Time 5 minutes
Cook Time 20 minutes
Total Time 25 minutes
Course main course
Cuisine Italian
Servings 5

Ingredients
  

  • Walnuts – 30 g 1 oz
  • Pine nuts – 15 g 1/2 oz
  • Basil leaves – 30 g 1 oz
  • Parmesan cheese grated – 1 cup
  • Salt – 1/4 tsp
  • Black pepper – 1/4 tsp
  • Lemon juice – 1 tbsp
  • Olive oil – 1/2 cup

For Pasta

  • Fusilli pasta – 225 g 1/2 lb
  • Salt – 1 tbsp for boiling water

For Cooking Base

  • Ghee – 1 tbsp
  • Garlic – 1 clove chopped
  • Fennel – 170 g 6 oz
  • Pasta water – 1/4 cup

For Garnish

  • Extra parmesan cheese
  • Remaining walnuts & pine nuts

Instructions
 

  • Toast Nuts
  • Roast walnuts and pine nuts on low heat for a few minutes until fragrant.

Make Pesto

  • In a blender, add basil leaves, parmesan cheese, half of the roasted nuts, salt, black pepper, lemon juice, and olive oil.
  • Blend for about 3 minutes until smooth.

Cook Pasta

  • Boil fusilli pasta in salted water for 8 minutes. Stir occasionally to prevent sticking.
  • Reserve 1/4 cup pasta water, then strain.

Prepare Base

  • Heat ghee in a pan. Add garlic and sauté briefly.
  • Add fennel and cook for a few minutes until slightly soft.

Combine

  • Add pasta water to the pan and mix.
  • Stir in prepared pesto sauce.
  • Add boiled pasta and mix well until fully coated.

Serve

  • Garnish with remaining walnuts, pine nuts, and parmesan cheese.

Notes

Secret of Vibrant Green Color 
A small squeeze of fresh lemon juice helps keep the pesto vibrant and bright while adding a fresh flavor that complements the basil.
Keyword basil pesto pasta, fennel pasta recipe, Fennel Pesto Pasta, homemade pesto sauce, pesto pasta recipe

Creamy Beetroot Dip with Cranberries & Walnuts

The deep vibrant color of beetroot transforms this dip into something that feels both striking and comforting at the same time. Blended with yogurt, and simple seasonings, this creamy beetroot dip brings together earthy sweetness, freshness, and gentle tanginess in a beautifully balanced way.

Its smooth texture and naturally bold color make it stand out on the table, while the yogurt keeps the flavor light and refreshing. Every spoonful carries a balance of creamy richness and earthy depth without feeling heavy, making it easy to pair with breads, grilled dishes, roasted vegetables, or simple snacks.

Dips like this show how everyday ingredients can become elegant with only a few thoughtful additions. Served chilled, the dip feels refreshing, colorful, and full of character — the kind of dish that quietly becomes the center of attention on the table.

Creamy Beetroot Dip with Cranberries & Walnuts

Prep Time 4 minutes
Pressure cook 8 minutes
Total Time 12 minutes
Course Side Dish
Cuisine Mediterranean
Servings 4

Equipment

  • 1 Instant Pot
  • 1 Mixing bowl
  • 1 Spatula
  • 1 Electric blender

Ingredients
  

  • 3 Beetroot small
  • 2 cups Yogurt
  • ¾ tsp Salt
  • ¾ tsp Cumin seeds Dry roasted and crushed
  • 2 tbsp Cranberries Chopped
  • 2 tbsp Walnuts Dry roasted and chopped

Instructions
 

  • Place the trivet in the inner pot of the Instant Pot
  • Pour ½ cup water into the pot
  • Place the beetroots on the trivet
  • Pressure on High for 8 minutes
  • Quick release the pressure
  • Remove the beetroots from the pot and let them cool
  • Blend into a smooth puree
  • Whisk the yogurt until smooth
  • Add 3-4 tbsp beetroot puree
  • Mix well
  • Add salt and cumin seeds
  • Add cranberries and walnuts
  • Mix well
  • Serve chilled as a dip, spread, part of mezze platter or enjoy on its own

Spicy Roasted Nuts

Warm spices clinging to crisp roasted nuts create the kind of snack that is difficult to stop reaching for. Every bite brings crunch, gentle heat, and deep roasted flavor, making these spicy nuts perfect for tea time, gatherings, travel, or simple everyday snacking.

The roasting process gives the nuts a richer aroma and deeper texture, while the spices add layers of warmth without overpowering their natural flavor. The balance between savory spices, toasted nuttiness, and crisp texture is what makes homemade roasted nuts feel far more satisfying than ordinary packaged snacks.

Served in small bowls alongside tea or shared during conversations and family gatherings, spiced nuts have long been part of relaxed snacking traditions in many regions. Simple, flavorful, and deeply crunchy, they turn everyday ingredients into something irresistibly enjoyable.

How to make Spicy Nut Mix at Home! (Better Than Store Bought)

A crunchy and flavorful mix of roasted almonds, walnuts, cashews, and makhana tossed in aromatic spices, ghee, and a touch of sweetness. Finished with raisins and cranberries, this snack is perfect for tea time, parties, or festive gatherings.
Roasting Time 10 minutes
Total Time 10 minutes
Course Appetizer, Snacks
Cuisine Indian, pakistani fusion
Servings 9

Equipment

  • Large frying pan or wok
  • Wooden spoon
  • Airtight storage container

Ingredients
  

  • 1 cup walnuts
  • 2 cups almonds
  • 1 cup cashews
  • 2 cups lotus seeds makhana
  • 2 –3 tbsp ghee
  • tsp red chili powder
  • tsp turmeric powder
  • tsp chaat masala optional
  • ½ tsp black salt kala namak, optional
  • 2 tsp salt adjust to taste
  • 2 –3 tbsp sugar add gradually
  • cups black raisins
  • cups dried cranberries

Instructions
 

  • Heat a large pan on low to medium flame.
  • Add almonds and walnuts and roast until fragrant and lightly golden. Remove and set aside.
  • In the same pan, add cashews and lotus seeds (makhana).
  • Roast until light golden and aromatic.
  • Add ghee and push cashews and makhana to one side of the pan.
  • Add red chili powder, turmeric powder, chaat masala, black salt, and regular salt.
  • Lightly fry the spices in ghee for a few seconds to release aroma.
  • Toss everything well so the nuts and makhana are evenly coated with spices.
  • Add roasted almonds and walnuts back into the pan and mix well.
  • Gradually add sugar and mix until slightly caramelized and balanced.
  • Add black raisins and dried cranberries.
  • Toss everything together until evenly combined.
  • Let it cool completely before storing or serving.

Notes

Always roast on low heat to avoid burning the nuts.
Add sugar gradually depending on your preferred sweetness.
You can store this mix in an airtight container for up to 2–3 weeks.
Customize with pistachios or peanuts if desired.
Keyword Healthy Nuts Mix, Spiced Roasted Nuts, Sweet and Spicy Nuts, Trail Mix Recipe, Makhana Snack

Creamy Hummus with Garlic Chili Oil

Hummus is one of those timeless dishes that beautifully combines simplicity, nourishment, and bold flavor using only a few wholesome ingredients. Made with chickpeas, tahini, garlic, lemon, and olive oil, hummus continues to remain a staple across many Middle Eastern tables because of its smooth texture, rich flavor, and incredible versatility.

This version is blended until extra creamy and finished with warm garlic chili oil for added depth, aroma, and richness. The balance between the nutty tahini, fresh lemon, savory garlic, and silky olive oil creates a dip that feels both comforting and deeply satisfying.

Whether served as part of a mezze spread, enjoyed with warm bread, paired with grilled dishes, or used as a nourishing snack, hummus continues to remain one of the most appreciated examples of how simple ingredients can create something both elegant and flavorful.

Creamy Hummus with Garlic Chili Oil – Middle Eastern Desi-fusion

A smooth and creamy homemade hummus made with chickpeas, tahini, olive oil, and salt, then topped with fragrant garlic chili oil for an extra layer of flavor. Perfect as a dip, spread, or part of a mezze platter.
Prep Time 5 minutes
Cook Time 5 minutes
Total Time 10 minutes
Course Appetizer
Cuisine Middle Eastern-Desi Fusion
Servings 5

Equipment

  • Food Processor or Blender

Ingredients
  

Hummus (Base Ingredients)

  • 2 cups 400 g boiled chickpeas
  • 130 g tahini
  • 1/4 cup olive oil
  • 1/3 cup water adjust as needed
  • 1 tsp salt

Tarka (Garlic Chili Oil)

  • 2-3 tbsp olive oil
  • 3-4 garlic cloves thinly sliced
  • 1 tsp chili flakes

Instructions
 

Hummus (Base Preparation)

  • Add boiled chickpeas, tahini, olive oil, water, and salt to a food processor.
  • Blend until smooth and creamy. Add more water if needed to reach your desired consistency.
  • Transfer the hummus to a serving bowl.

Tarka (Garlic Chili Oil)

  • Heat olive oil in a small pan.
  • Add the sliced garlic and fry until golden and fragrant.
  • Remove the pan from the heat.
  • Add the chili flakes and stir immediately.
  • Pour the garlic chili oil over the hummus.
  • Serve immediately.

Notes

Adjust the amount of water to achieve your preferred consistency.
Adding the chili flakes after removing the oil from the heat helps prevent them from burning.
Serve with pita bread, fresh vegetables, crackers, or as part of a mezze platter.
Keyword chickpea dip, creamy hummus, homemade hummus, hummus recipe

Classic Spaghetti Bolognese in Multi- Cooker

Spaghetti bolognese is one of those timeless comfort meals that brings together rich tomato sauce, savory minced meat, herbs, and perfectly cooked pasta in a beautifully satisfying way. Its balance of warmth, simplicity, and deep flavor continues to make it one of the most loved pasta dishes across many kitchens around the world.

The slow cooked richness of the meat sauce combined with garlic, onions, tomatoes, and herbs creates layers of flavor that feel both hearty and comforting. Every strand of pasta coated in the rich sauce brings together the kind of familiar and satisfying flavor that makes classic pasta dishes so widely appreciated.

Over time, spaghetti bolognese has also become highly adaptable, with many kitchens adding their own variations and flavors while still preserving the comforting essence of the dish. Whether served as a family dinner, weekend comfort meal, or cozy homemade pasta night, spaghetti bolognese continues to remain a timeless favorite built around warmth, richness, and simple satisfying cooking.

Classic Spaghetti Bolognese in Multi- Cooker

This Spaghetti Bolognese is a rich, hearty, and comforting pasta dish made with slow-simmered ground beef, vegetables, tomato sauce, and Italian herbs. Cooked until thick and flavorful, the sauce coats every strand of spaghetti perfectly and is finished with fresh basil and Parmesan cheese. A simple yet satisfying family favorite that never fails
Prep Time 15 minutes
Cook Time 50 minutes
Total Time 1 hour 5 minutes
Course italian
Cuisine dinner, main course
Servings 6

Equipment

  • Multi- cooker

Ingredients
  

  • For the Sauce
  • 1 –2 tbsp olive oil
  • 1 medium onion chopped
  • 1 stalk celery chopped
  • 2 medium carrots shredded
  • 3 cloves garlic minced
  • 500 g 1 lb ground beef
  • 1 tsp oregano
  • 1 tsp salt adjust to taste
  • 1/2 tsp black pepper
  • 1 tbsp tomato paste
  • 1 cup beef stock
  • 2 cups tomato purée
  • 5 –6 fresh basil leaves
  • For Pasta
  • 500 g 1 lb spaghetti, cooked
  • Grated Parmesan cheese for serving

Instructions
 

  • Heat olive oil in a multi- cooker over medium heat.
  • Add chopped onion, celery, shredded carrots, and garlic.
  • Cook for about 5 minutes until vegetables are softened.
  • Add ground beef and cook until browned, breaking it apart as it cooks.
  • Season with oregano, salt, and black pepper.
  • Stir in tomato paste and mix well to combine.
  • Pour in beef stock and tomato purée, then mix thoroughly.
  • Add fresh basil leaves.
  • Simmer the sauce for 40 minutes, stirring occasionally, until thick and rich.
  • Add cooked spaghetti and mix until fully coated with sauce.
  • Serve hot, topped with grated Parmesan cheese.

Notes

Slow simmering enhances the depth of flavor.
Fresh basil gives the best aroma, but dried basil can be used if needed.
Leftover sauce can be stored in the fridge for up to 3 days.
Keyword Bolognese Recipes, Classic Spaghetti, Ground Beef Pasta, multi cooker

Mutton Yakhni – Aromatic Lamb Bone Broth

Mutton yakhni is one of those deeply comforting traditional dishes built around simplicity, warmth, and rich aromatic flavor. Made by pressure cooking lamb bones with whole spices, ginger, garlic, and aromatics, this broth develops a beautifully rich and nourishing flavor while saving time compared to traditional long simmering methods.

Across many South Asian, Central Asian, and Middle Eastern kitchens, yakhni continues to hold a special place because of the way simple ingredients transform into a comforting and flavorful broth. Even with modern pressure cooking methods, the broth still carries the warmth, depth, and richness traditionally associated with homemade yakhni.

Recipes like this are often appreciated not only for their flavor but also for the feeling of comfort and nourishment they bring, especially during colder seasons or whenever lighter and soothing meals are preferred. Served on its own or used as a flavorful base for rice and soups, mutton yakhni continues to remain a timeless part of traditional home-style cooking.

Mutton Yakhni – Aromatic Lamb Bone Broth

A rich and aromatic Mutton Yakhni – Aromatic Lamb Bone Broth made with whole spices, ginger garlic, and tender lamb shanks. This traditional Pakistani bone broth curry is deeply flavorful, comforting, and perfect as a wholesome meal on its own or with paratha.
Prep Time 5 minutes
Cook Time 2 hours
Total Time 2 hours 5 minutes
Course Soup
Cuisine Pakistani, South Asian
Servings 4

Equipment

  • Instant Pot or Pressure Cooker
  • Stove
  • Wooden Spoon / Spatula
  • Measuring Spoons

Ingredients
  

  • 2 tbsp oil
  • 1 green cardamom
  • 1 black cardamom
  • 1 clove
  • 1 inch cinnamon stick
  • 1/4 tsp whole black pepper
  • 2 tbsp thinly sliced onions
  • 2 tsp ginger garlic paste
  • 1/2 tsp salt
  • 1/4 tsp red chili powder
  • 1/4 tsp turmeric powder
  • 750 g lamb shanks
  • 4 cups water

Instructions
 

pressure cook instructions

  • Pressure Cook on High for 2 hours and release the pressure Naturally
  • Heat the pot on High in Sauté mode until a drop of water glides across the surface like mercury instead of evaporating quickly.
  • Add oil and heat it.
  • Add whole spices and fry briefly.
  • Add sliced onions and lightly sauté.
  • Add ginger garlic paste and fry until aroma releases.
  • Add salt, red chili powder, and turmeric powder.
  • Add a splash of water and lightly fry the spices.
  • Add lamb shanks and fry on high heat until moisture evaporates and meat changes color.
  • Add water.
  • pressure cook on High.

Notes

Enjoy yakhni on its own as a light, nourishing soup, or serve it with crumbled parathas for a comforting meal. It can also be used as a flavorful base for pulao, soups, stews, sauces, and other recipes that benefit from a rich homemade broth.
Keyword Easy Instant Pot meals, Instant Pot cooking, Instant Pot dinner ideas, lamb yakhni, mutton yakhni, Pakistani yakhni, Pressure cooker recipes, yakhni recipe

Raw Honey: Traditional Uses, Nourishing Qualities, and Everyday Benefits

Raw honey has been appreciated for generations across many cultures for its natural sweetness, rich flavor, and comforting qualities. Unlike heavily processed sweeteners, raw honey continues to remain valued in many traditional kitchens because of its simplicity and its close connection to natural food traditions.

Whether stirred into warm drinks, drizzled over nourishing meals, or enjoyed by the spoonful, raw honey brings both flavor and warmth to everyday routines. Its smooth texture and deep floral sweetness make it one of the most timeless ingredients used across both traditional and modern kitchens.

In many Eastern and Middle Eastern traditions, honey is also associated with nourishment, balance, and mindful eating. Its versatility and naturally rich taste continue to make it a staple ingredient appreciated across generations.

Raw Honey: Traditional Uses, Nourishing Qualities, and Everyday Benefits

Spicy Pepper Beef Karahi

Spicy Pepper Beef Karahi is a bold and deeply savory dish built around the rich flavor of beef, freshly cracked black pepper, green chilies, and aromatic ginger garlic paste. Unlike heavily tomato-based curries, this style of karahi focuses more on the natural flavor of the meat and the warmth of spices, creating a dish that feels rich, comforting, and full of character.

Black pepper and green chilies give the dish its distinctive heat while still allowing the flavor of the beef to remain the center of attention. Pressure cooking helps the spices coat the meat beautifully, creating layers of warmth, aroma, and depth in every bite.

Karahi-style dishes continue to remain popular across many South Asian kitchens because of their simplicity and strong flavor. Served sizzling hot with naan, rice, or warm flatbread, spicy pepper beef brings together richness, spice, and comforting home-style cooking in a timeless and satisfying way.

Spicy Pepper Beef Recipe | Tender Pressure Cooker Beef (Easy & Juicy)

This Spicy Pepper Beef is a rich and tender beef dish made with boneless beef, ginger-garlic, green chilies, and black pepper. Pressure cooked until perfectly tender and then stir-fried for maximum flavor, it pairs wonderfully with rice, naan, or roti.
Prep Time 5 minutes
Cook Time 10 minutes
pressure cook 1 hour
Total Time 1 hour 15 minutes
Course main course
Cuisine Pakistani, South Asian
Servings 6
Calories 380 kcal

Equipment

  • Ninja Foodi

Ingredients
  

For Cooking Beef

  • 2 lbs 1000 g beef boneless cubes
  • 1/2 cup oil
  • 3 tbsp chopped ginger and garlic
  • 1 tbsp chopped green chilies
  • 2 tsp salt adjust to taste

For Final Flavoring

  • 2 tsp black pepper crushed or ground
  • 1/4 tsp garam masala
  • 2 tbsp lemon juice
  • 5 –6 whole green chilies
  • Fresh cilantro chopped (for garnish)

Instructions
 

  • Heat the oil in the inner pot of Ninja Foodi
  • Add beef cubes, chopped ginger-garlic, green chilies, and salt. Mix well.
  • pressure cook without adding water, as beef will release its own moisture.

Pressure cook instruction:

  • Pressure Cook at High for 1 hour, or until beef becomes tender.
  • release the pressure Naturally
  • Open the lid and mix the beef well.

For Final Flavoring

  • Switch to sauté mode or cook on high heat until all water dries up.
  • Fry the beef until oil starts separating and it turns slightly browned.
  • Add black pepper, garam masala, and lemon juice. Mix well.
  • Continue frying until the masala is fully absorbed and oil separates again.
  • Add whole green chilies (slit or whole depending on spice preference).
  • Cover and simmer for a few minutes until chilies release their aroma.
  • Finish with freshly chopped cilantro.

Notes

No water is needed during cooking as beef releases enough moisture.
For extra heat, increase black pepper or use sliced green chilies.
Slow frying at the end enhances the depth of flavor.
This dish pairs perfectly with naan or steamed rice.
Keyword Beef Masala, Easy Ninja Foodi Recipe, Ninja Foodi Beef, Ninja Foodi Pressure Cooker, Pakistani Beef Curry, Pressure Cooked Beef, Pressure Cooker Beef, Spicy Pepper Beef

Karela Keema – Spiced Bitter Melon with Minced Meat

Karela keema is one of those deeply traditional dishes that beautifully balances bold flavors with comforting home-style cooking. The richness of spiced minced meat pairs naturally with the distinctive flavor of karela, also known as bitter melon, creating a dish that feels both hearty and layered in taste.

Across many South Asian kitchens, karela has long been appreciated not only for its unique flavor but also for its place in balanced everyday cooking. Traditionally valued for its nourishing qualities, karela continues to remain a popular ingredient in many homes where simple wholesome foods are preferred as part of regular meals.

When cooked with onions, warming spices, and keema, the bitterness becomes more mellow while still preserving the character that makes the dish special. Ingredients such as lemon juice or tamarind are also commonly used to gently balance the bitterness, adding brightness and depth without overpowering the savory richness of the dish.

Served with warm roti, naan, or rice, karela keema remains one of those timeless homestyle recipes that brings together nourishment, bold flavor, and traditional comfort in a beautifully satisfying way.

Karela Keema – Spiced Bitter Melon with Minced Meat

This Ground Beef with Bitter Gourd is a traditional, flavorful curry that perfectly balances the earthy bitterness of karela (bitter gourd) with rich, spiced ground beef. Fried bitter gourd is combined with aromatic ginger-garlic, fried onions, and warming spices, then simmered until tender and deeply flavorful. A splash of lemon juice brightens the dish, making it a comforting and wholesome meal best enjoyed with roti or rice.
Prep Time 15 minutes
Cook Time 40 minutes
Total Time 55 minutes
Course main course
Cuisine Indian, Pakistani
Servings 6

Ingredients
  

For Bitter Gourd

  • 350 g 12.5 oz bitter gourd (karela), sliced
  • 1/4 cup oil for frying

For Beef Masala

  • 1/4 cup oil
  • 3 tbsp ginger and garlic paste
  • 750 g 26.5 oz ground beef (keema)
  • 1 1/2 cups fried onions
  • 2 tsp salt adjust to taste
  • 3 tsp red chili powder
  • 1/4 tsp turmeric powder
  • 2 tbsp coriander seeds dry roasted and crushed
  • 2 tsp cumin seeds dry roasted and crushed

Final Seasoning

  • 3 –4 tbsp lemon juice
  • 1/4 tsp black pepper
  • 1/4 tsp garam masala
  • Fresh cilantro chopped, to taste
  • Green chilies chopped, to taste

Instructions
 

  • Heat 1/4 cup oil in a pan and add sliced bitter gourd (karela).
  • Fry for a few minutes until slightly golden, then remove and set aside.
  • In the same pan, add another 1/4 cup oil.
  • Add ginger and garlic paste and sauté until aromatic and lightly golden.
  • Add ground beef (keema) and cook until it starts to brown.
  • Mix in fried onions, salt, red chili powder, turmeric, crushed coriander seeds, and crushed cumin seeds.
  • Stir well and fry until the color of the meat changes and spices are well combined.
  • Cover and simmer on low heat for 15 minutes, stirring occasionally to prevent sticking.
  • Add the fried bitter gourd and mix well.
  • Cover and cook again until the bitter gourd becomes tender and fully infused with the masala.
  • Add lemon juice to balance the bitterness and enhance flavor.
  • Sprinkle black pepper and garam masala, then mix gently.
  • Cover and simmer for a few more minutes.
  • Add chopped cilantro and green chilies.
  • Cover and cook briefly until the chilies release their aroma.

Notes

Chef’s Tip to Balance the Bitterness Adding lemon juice helps reduce the bitterness of bitter melon while brightening and balancing the overall flavor of the dish.
Keyword Bitter Gourd Curry, Ground Beef Bitter Gourd, Keema Karela, Pakistani Keema Recipe

High Protein Egg Cups

High Protein Egg Cups are a simple and practical way to bring together flavor, nourishment, and convenience in one satisfying meal. Made with eggs, cheese, and savory ingredients baked until soft and fluffy, these egg cups feel both hearty and easy to enjoy at any time of the day.

Egg-based recipes continue to remain popular across many kitchens because they are naturally rich in protein, quick to prepare, and incredibly versatile. Combined with cheese and other flavorful ingredients, these baked egg cups create a comforting balance of richness, texture, and savory flavor.

Their compact size and simple preparation also make them especially useful for busy mornings, meal preparation, or light homemade snacks. Served warm, high protein egg cups offer a satisfying and practical option that fits naturally into balanced everyday meals while still feeling comforting and homemade.

High Protein Egg Cups (30g Protein) | Easy Breakfast Muffins

These High Protein Egg Cups are a quick, nutritious, and satisfying breakfast option packed with flavor and protein. Made with beef pastrami, eggs, Parmesan cheese, and a touch of mustard, they bake into perfectly portioned muffin-style cups with a rich, savory taste and a soft, slightly runny yolk. Ideal for meal prep, busy mornings, or a high-protein diet.
Prep Time 5 minutes
Cook Time 12 minutes
Total Time 17 minutes
Course Breakfast, brunch
Cuisine American
Servings 6

Equipment

  • Oven

Ingredients
  

  • Cooking spray for greasing muffin tray
  • 2 tsp salt
  • 12 slices beef loin pastrami
  • 12 large eggs
  • 6 tsp French mustard ½ tsp per cup
  • 60 g 2 oz Parmesan cheese, grated
  • Black pepper to taste
  • Chili flakes to taste
  • Fresh parsley chopped (for garnish)

Instructions
 

  • Preheat your oven to 350°F (175°C).
  • Lightly spray a 12-cup muffin tray with oil to prevent sticking.
  • Line each muffin cup with a slice of beef pastrami, pressing it gently to form a base.
  • Add ½ teaspoon French mustard into each cup over the pastrami.
  • Carefully crack one egg into each cup.
  • Sprinkle grated Parmesan cheese evenly over all the eggs.
  • Season with black pepper and chili flakes according to taste.
  • Bake for 10–12 minutes, or until the egg whites are set but yolks remain slightly runny.
  • Remove from the oven and let them rest for 1–2 minutes.
  • Garnish with fresh chopped parsley before serving.

Notes

For firmer yolks, bake for an additional 2–3 minutes.
Silicone muffin trays make removal much easier.
You can add spinach, mushrooms, or bell peppers for extra nutrition.
Great for meal prep—store in the fridge for up to 3 days.
Keyword Breakfast Muffins, Egg Muffins, High Protein Egg Cups, Keto Breakfast, Low Carb Egg Recipe
Privacy Overview

This website uses cookies to provide you with the best possible user experience. Cookie information is stored by your browser and performs functions such as recognizing you when you return to our website, as well as helping our team understand which parts of the website are most interesting and useful to you.