Kulfa Saag with Chana Dal | Traditional Purslane & Lentil Curry

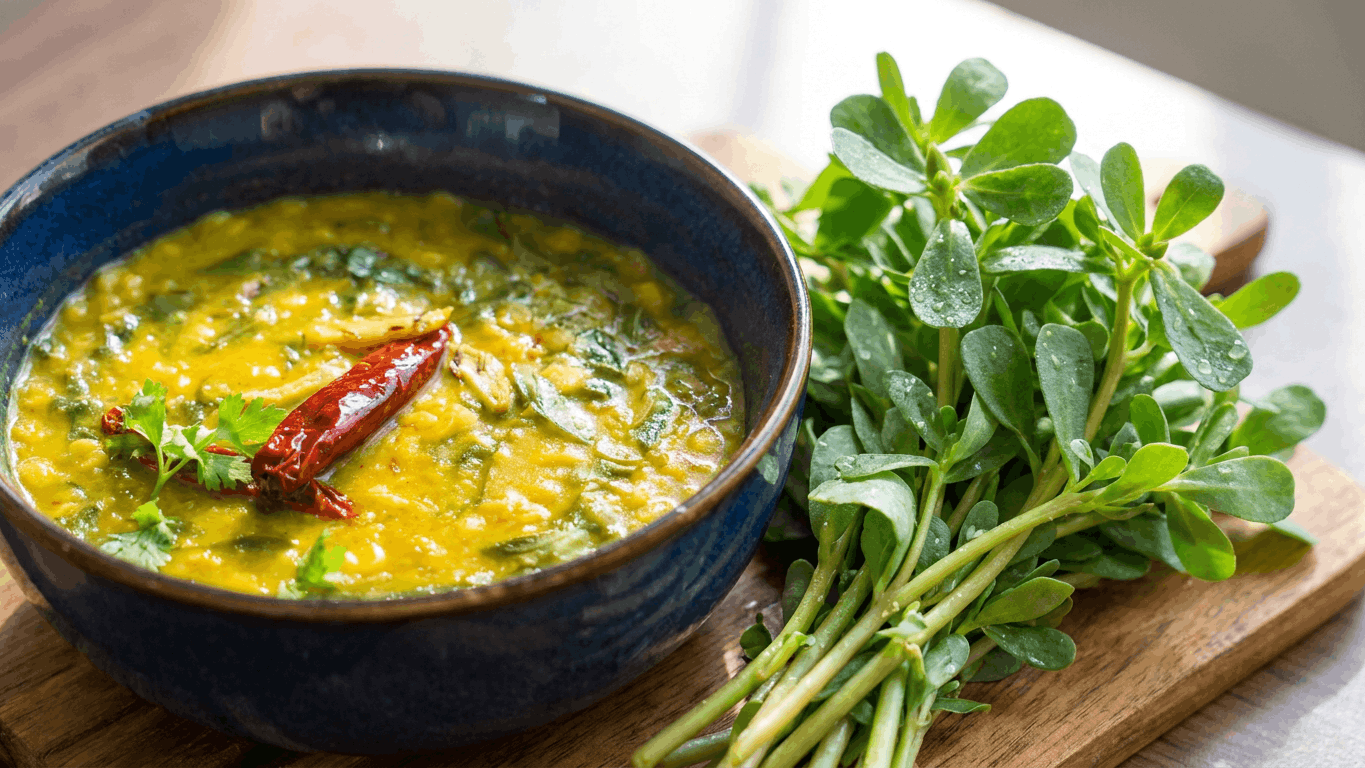
What Is Kulfa (Purslane)?

Kulfa, also known as purslane, is a nutritious leafy green vegetable commonly used in South Asian and Middle Eastern cooking. It has tender, succulent leaves with a mild tangy flavor and is enjoyed in a variety of curries, stews, and saag recipes.

Health Benefits of Kulfa

Kulfa is naturally rich in vitamins A and C, antioxidants, minerals, and plant-based omega-3 fatty acids. It is also a good source of fiber, making it a wholesome addition to a balanced diet. Its nutrient-rich profile has made it a popular ingredient in traditional home cooking for generations.

Why Combine Kulfa with Chana Dal?

Chana dal pairs beautifully with kulfa by adding a hearty texture and mild nutty flavor to the dish. The lentils contribute plant-based protein and fiber, creating a more satisfying and balanced meal. Together, kulfa and chana dal create a nourishing combination that is both comforting and flavorful.

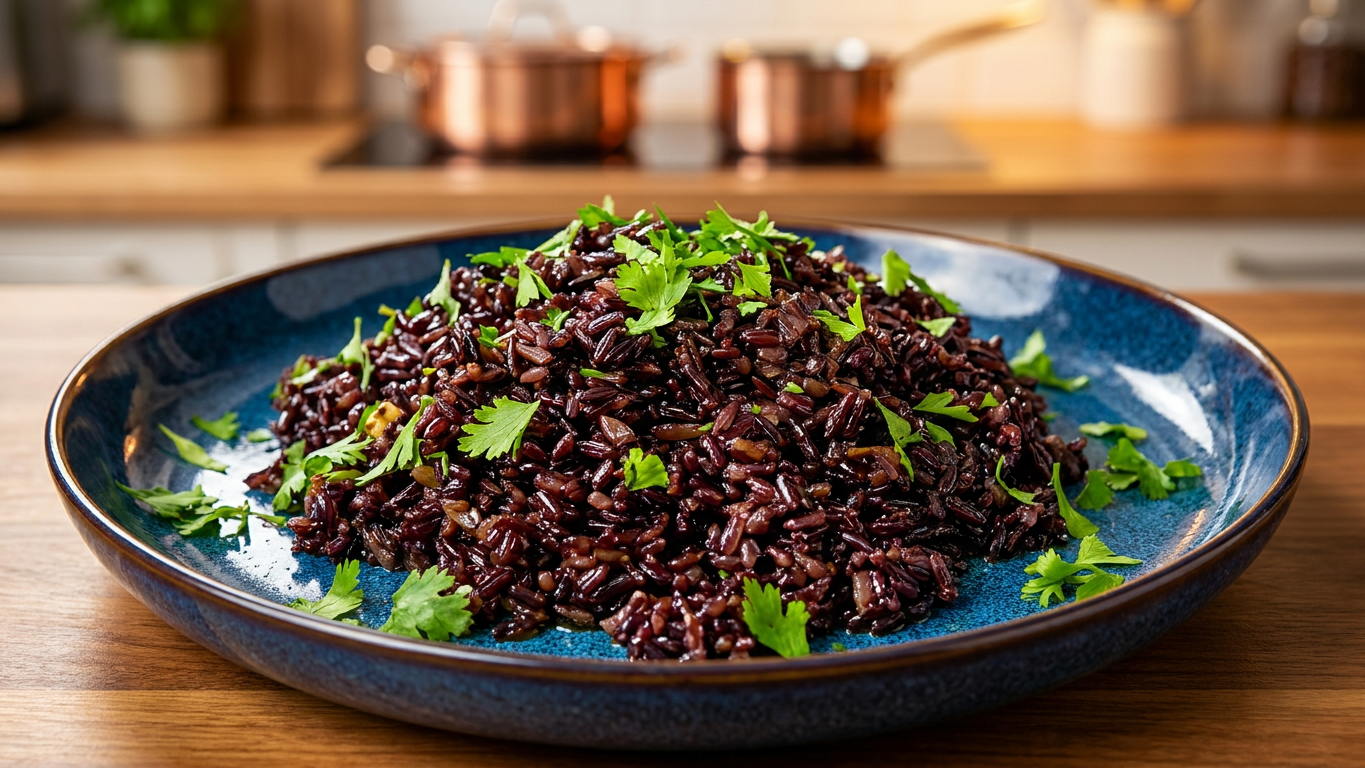
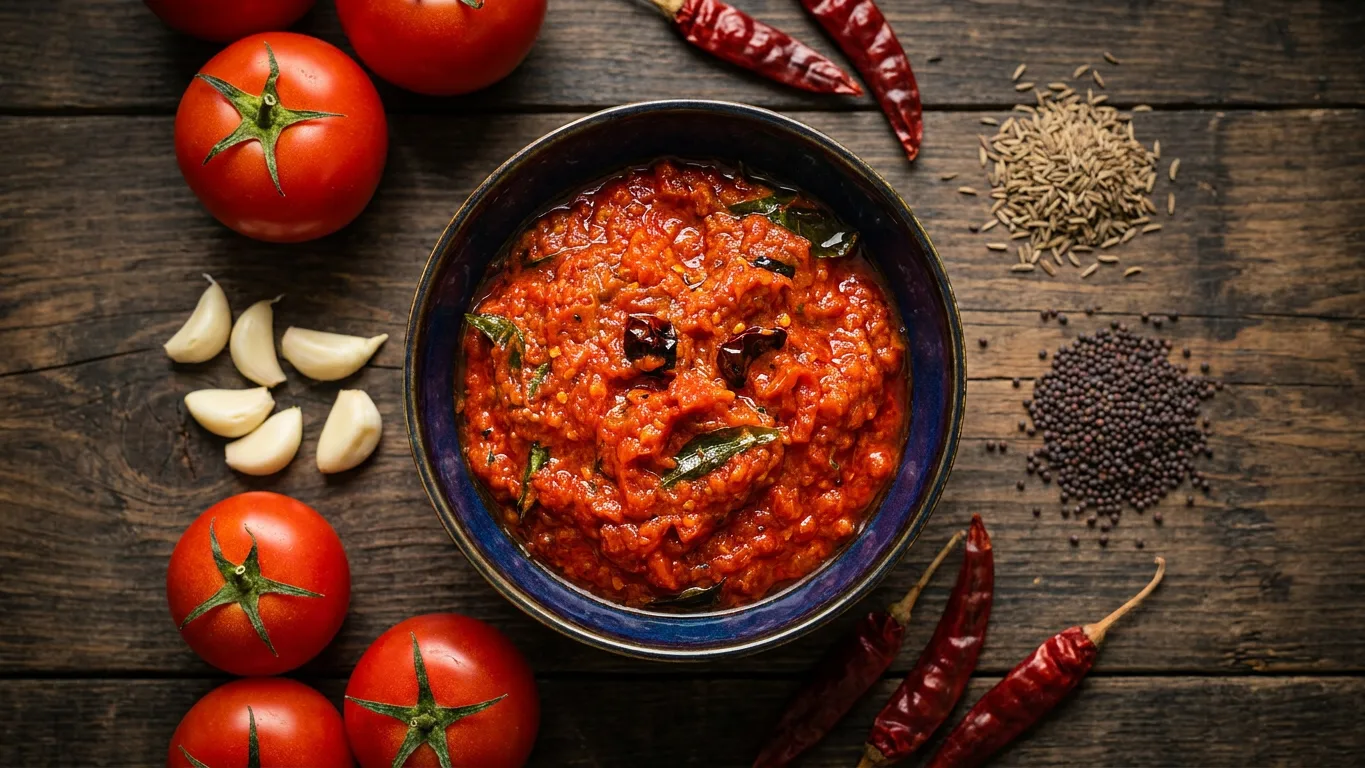
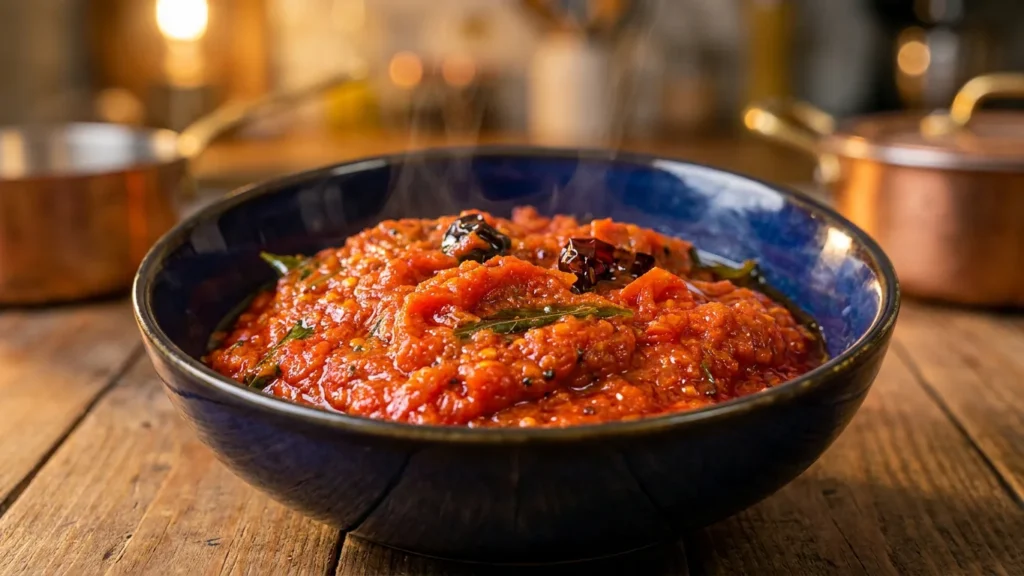
Kulfa Saag is a simple and wholesome lentil dish made with purslane leaves (kulfa saag) and yellow lentils. It is cooked with garlic, cumin, curry leaves, and spices to create a comforting meal full of flavor. The lentils make it hearty, while the kulfa adds a fresh and slightly tangy taste that makes this dish special.

This recipe is made in Ninja Foodi, which makes it easy and convenient for everyday cooking but it can be prepared in any pressure cooker or over the stove top.
Garlic and spices are first fried in ghee to build a rich base, then the lentils are cooked until soft before adding the kulfa leaves. The result is a delicious and nourishing dish.


Kulfa Saag with Chana Dal | Traditional Purslane & Lentil Curry

A comforting and flavorful kulfa saag recipe made with purslane leaves, yellow lentils, garlic, cumin, curry leaves, and simple spices. This quick and Ninja Foodi recipe is perfect for a wholesome lunch or dinner on weekdays.
Prep Time 10 minutes
pressure cook 30 minutes
Total Time 40 minutes
Course main course
Cuisine South Asian
Servings 6

Equipment

  • Ninja Foodi

Ingredients
  

  • 1/2 cup ghee
  • 6 to 7 garlic cloves thinly sliced
  • 1 tsp cumin seeds
  • 5 to 6 dry red chilies
  • 15 to 20 curry leaves
  • 1 1/2 cups yellow lentils split Bengal gram, washed and soaked for 30 minutes
  • 2 1/2 cups water
  • 2 tsp salt
  • 1 1/2 tsp red chili powder
  • 1/4 tsp turmeric powder
  • 300 g purslane leaves kulfa saag, washed, drained, and stalks removed
  • 3/4 cup water

Instructions
 

  • Turn on saute mode, add ghee in the inner pot of Ninja Foodi.
  • Add the sliced garlic and fry for a few moments until fragrant and slightly golden.
  • Add cumin seeds, dry red chilies, and curry leaves. Fry until the garlic turns golden and the spices change color, but do not burn them.
  • Remove 2 red chilies and set them aside for garnish if desired.
  • Add the soaked yellow lentils and fry for a few moments.
  • Pour in 2 1/2 cups water and add salt, red chili powder, and turmeric powder. Mix well.
  • Pressure cook on high for 20 minutes, then let the pressure release naturally.
  • Open the cooker and mix well.
  • Add the kulfa saag and 3/4 cup water. Mix well.
  • Pressure cook again on high for 10 minutes and let the pressure release naturally.
  • Open the cooker, mix well, and adjust the consistency according to your preference.

Notes

Serving Suggestions:
This Kulfa Saag with Chana Dal can be enjoyed with roti, naan, or steamed rice. For a lighter meal, it can also be served as a hearty soup. Simply adjust the consistency with a little extra water and enjoy it on its own or with bread for a comforting and nutritious meal.
Soaking the lentils helps them cook faster and become soft.
You can make the dish thinner or thicker by adjusting the water at the end.
Save the fried red chilies for garnish if you like a traditional look.
Keyword kulfa saag, lentil and greens curry, purslane recipe

Black Rice (Forbidden Rice) Pilaf

Why Is Black Rice Called Forbidden Rice?

Black rice is often called forbidden rice because, according to ancient Chinese tradition, it was once reserved for emperors and the royal court. Due to its rarity and perceived nutritional value, ordinary people were reportedly not allowed to eat it.

Today, black rice is enjoyed around the world for its slightly nutty flavor, striking dark color, and impressive nutritional profile. It is naturally rich in antioxidants, particularly anthocyanins, the same compounds that give blueberries their deep color.

While the name “forbidden rice” comes from its royal history, there is nothing forbidden about enjoying this nutritious grain today. 🍚

Black Rice Pilaf is a flavorful and comforting rice dish that is perfect for lunch or dinner. It is made with black rice, ghee, onions, whole spices, tomatoes, yogurt, and bone broth, which come together to create a rich and aromatic meal. The warm flavors of black cumin, cloves, cardamom, cinnamon, and black pepper make this pilaf taste special and different from everyday rice recipes.

This recipe is prepared in Instant Pot, so it is simple to make and does not require too much work, but you can make it in any pressure cooker or on stove top. The onions are lightly fried in ghee, then the spices, ginger, garlic, and tomatoes are cooked together to build a deep and delicious flavor. Yogurt adds richness, while bone broth makes the rice even more tasty, nutritious and comforting.

Black Rice (Forbidden Rice) Pilaf

A flavorful one-pot black rice pilaf ready in about 20 minutes, made with ghee, whole spices, tomatoes, yogurt, and bone broth. This easy rice recipe is rich, aromatic, and perfect for lunch or dinner on week days.
Prep Time 5 minutes
pressure cook 20 minutes
Total Time 25 minutes
Course main course
Cuisine south asian fusion
Servings 4

Equipment

  • Instant Pot

Ingredients
  

  • 2 tbsp + 1 tsp ghee
  • 1/4 cup onion thinly sliced
  • 1/4 tsp black cumin
  • 2 cloves
  • 1 green cardamom
  • 1 black cardamom
  • 1/2 inch cinnamon
  • 4 to 5 black peppercorns
  • 1 tsp chopped ginger and garlic
  • 3/4 cup finely chopped tomatoes
  • 1 tsp salt
  • 2 tbsp Shan Biryani Masala optional
  • 3 tbsp yogurt
  • 1 1/2 cups homemade bone broth
  • 1 cup black rice

Instructions
 

  • Add ghee to the inner pot of Instant Pot and turn on saute mode at high.
  • Fry the sliced onion until lightly golden.
  • Add black cumin, cloves, green cardamom, black cardamom, cinnamon, and black pepper. Fry for a few seconds.
  • Add chopped ginger and garlic and fry until fragrant.
  • Add chopped tomatoes, mix well, cover, and cook on medium heat, stirring occasionally to prevent burning.
  • Add salt and Shan Biryani Masala (optional). Mix well and cook until tomatoes soften and oil separates.
  • Add yogurt, mix well, and cook until the moisture dries out.
  • Fry the masala well until the oil separates.
  • Add bone broth, cover and bring it to a boil.
  • Add black rice, mix gently, and level the rice for even cooking.
  • Pressure cook on high for 20 minutes, then let the pressure release naturally.
  • Gently fluff the rice and serve hot.

Notes

Shan Biryani Masala is optional but adds extra flavor.
For extra flavor and nutrition use the Meaningful Masala Bone Broth.
Fluff the rice gently to keep the grains whole.
Keyword black rice pilaf, black rice recipe, one pot rice recipe

Spicy Pan-Seared Chicken & Spaghetti

This Spicy Pan-Seared Chicken and Spaghetti is a creamy and flavorful pasta dish that is perfect for busy weeknights. Tender chicken fillets are seasoned with herbs and spices, then served over spaghetti tossed in a rich tomato cream sauce with sun-dried tomatoes and crispy beef salami.

The combination of juicy chicken, creamy pasta, and a touch of heat makes this an easy meal that the whole family will love. Serve it fresh and enjoy a restaurant-style dinner at home.

Why You’ll Love This Recipe

  • Creamy and rich pasta sauce
  • Juicy pan-seared chicken
  • Packed with bold flavors
  • Easy enough for weeknight dinners
  • Ready in under an hour

Spicy Pan-Seared Chicken & Spaghetti

Spicy Pan-Seared Chicken & Spaghetti combines juicy seasoned chicken, crispy beef salami, and tender spaghetti tossed in a rich and creamy tomato sauce. Packed with herbs and a touch of heat, this comforting pasta dish is perfect for an easy and satisfying dinner.
Prep Time 5 minutes
Cook Time 35 minutes
Total Time 40 minutes
Course Dinner, main course, Pasta
Cuisine American, Fusion, Italian
Servings 4

Ingredients
  

For the Chicken

  • 2 tablespoons ginger garlic paste
  • 1 tablespoon lemon juice
  • 1 teaspoon cooking oil
  • 1 teaspoon dried oregano
  • 1 teaspoon paprika powder
  • 1 teaspoon salt
  • ½ teaspoon black pepper
  • 12 oz 360 g chicken fillet

For the Salami

  • 1 tablespoon cooking oil
  • 2 oz 60 g beef salami, sliced

For the Sauce and Pasta

  • 2 tablespoons ghee
  • 1 medium onion chopped
  • 2 garlic cloves minced
  • 1 red chili pepper sliced
  • ¼ cup sun-dried tomatoes chopped
  • 2 tablespoons tomato paste
  • ½ cup chicken stock
  • 1 cup heavy cream
  • 1 teaspoon dried oregano
  • 1 teaspoon dried basil
  • ¼ teaspoon chili flakes
  • 1 teaspoon paprika powder
  • 1 teaspoon salt
  • ½ teaspoon black pepper
  • 12 oz 360 g spaghetti, cooked
  • Chopped cilantro to taste

Instructions
 

Marinate the Chicken

  • In a bowl, combine the ginger garlic paste, lemon juice, oil, dried oregano, paprika powder, salt, and black pepper. Add the chicken fillet and coat well. Let it marinate for 10 minutes.

Fry the Salami and Sear the Chicken

  • Heat 1 tablespoon oil in a skillet and fry the sliced beef salami for 2 to 3 minutes. Transfer to a paper towel-lined plate. In the same pan, sear the chicken for 4 to 5 minutes per side until cooked through. Remove from the pan and slice.

Prepare the Creamy Sauce

  • Melt the ghee in the same pan. Add the onion, garlic, and red chili pepper and cook over medium heat for 3 to 4 minutes. Stir in the sun-dried tomatoes and cook for 2 minutes. Add the tomato paste and cook for another 2 minutes.
  • Pour in the chicken stock and heavy cream. Add the dried oregano, dried basil, chili flakes, paprika powder, salt, and black pepper. Mix well and simmer for 3 to 4 minutes.

Toss the Spaghetti

  • Add the cooked spaghetti to the sauce and toss until evenly coated. Garnish with chopped cilantro and serve hot topped with the sliced chicken fillet and crispy salami.

Notes

Use freshly grated Parmesan cheese for extra flavor.
* Adjust the chili flakes to your preferred spice level.
* Leftovers can be stored in the refrigerator for up to 3 days.
* Serve with garlic bread or a fresh green salad for a complete meal.
Keyword Chicken Spaghetti Recipe, Pan-Seared Chicken Pasta, Spicy Pan-Seared Chicken & Spaghetti

Mutton Karahi

If you’re craving a rich and hearty dish packed with bold flavors, this Mutton Karahi is a recipe you’ll want to make again and again. Tender pressure-cooked mutton is simmered with fresh tomatoes, aromatic spices, and green chilies until the masala becomes thick and fragrant. Finished with fresh ginger and extra chilies, this classic karahi delivers authentic flavors that pair perfectly with warm naan or steamed rice.

Despite its impressive taste, this recipe is surprisingly easy to prepare. Using a pressure cooker helps the mutton become tender in less time, while the freshly roasted spice blend adds incredible depth and aroma. Whether you’re serving it for a family dinner or a special gathering, this spicy and comforting dish is sure to be a crowd-pleaser.

Mutton Karahi

Mutton Karahi is a classic Pakistani dish made with tender pressure-cooked mutton simmered in a rich tomato-based masala and fragrant roasted spices. Fresh green chilies and ginger add a bold, authentic flavor, while high-heat cooking creates the signature thick and flavorful gravy. Perfect for family dinners or special occasions, this hearty dish pairs wonderfully with naan, roti, or steamed rice.
Prep Time 10 minutes
Cook Time 20 minutes
Bhuna time 35 minutes
Total Time 1 hour 5 minutes
Course Dinner, Main Dish
Cuisine Pakistani, South Asian
Servings 6

Equipment

  • Instant Pot and Wok

Ingredients
  

For the Mutton

  • 2 pounds 900 g mutton mix pieces
  • 1 tablespoon ginger garlic paste
  • 1 teaspoon salt
  • 2 cups water

For the Roasted Spice Mix

  • 1 teaspoon coriander seeds
  • 1 teaspoon cumin seeds
  • 12 –13 black peppercorns
  • 2 green cardamom pods
  • 6 dried red chilies

Additional Spices

  • ½ teaspoon red chili powder
  • 1 teaspoon turmeric powder
  • 1 teaspoon salt

For the Karahi

  • 1 cup oil
  • 2 medium onions sliced
  • 1 tablespoon ginger garlic paste
  • 2 tablespoons green chili paste
  • 1 pound 450 g tomatoes
  • Fresh green chilies sliced
  • Ginger julienne for garnish

Instructions
 

Pressure Cook the Mutton

  • Add the mutton, ginger garlic paste, salt, and water to the pressure cooker. Mix well and spread the meat evenly.
  • Close the lid and pressure cook on High for 20 minutes. Allow the pressure to release naturally.

Prepare the Karahi Masala

  • Dry roast coriander seeds, cumin seeds, black peppercorns, green cardamom, and dried red chilies. Let them cool and grind coarsely.
  • Mix the roasted spices with red chili powder, turmeric, and salt.

Bhuna the Karahi

  • Heat oil in a karahi or large pan. Add sliced onions and fry for a few minutes.
  • Stir in ginger garlic paste and green chili paste. Cook until fragrant.
  • Add the tomatoes, cover, and cook until soft. Remove the tomato skins if desired.
  • Add the cooked mutton and cook over high heat until most of the moisture evaporates.
  • Add the spice mixture and continue frying.
  • Add green chilies and cook until the oil separates from the masala.
  • Garnish with ginger julienne and serve hot with naan.

Notes

Natural pressure release helps keep the mutton tender and juicy.
Fresh tomatoes give the best flavor to the karahi.
Adjust the number of green chilies according to your preferred spice level.
Serve with naan, roti, or steamed rice.
Keyword Desi Mutton Recipe, Easy Mutton Karahi Recipe, Karahi Gosht, Pakistani Goat Curry

Crispy Masala Fish in Ninja Food

This Crispy Masala Fish is packed with bold spices and cooked until perfectly golden and crispy. The fish is marinated with aromatic seasonings and served with a fresh and flavorful mint chutney that adds a refreshing touch.

This easy recipe is perfect for lunch, dinner, or as an appetizer for gatherings. Made in the Ninja Foodi using the Air Crisp function, it gives you delicious crispy fish with less oil.

Why You’ll Love This Recipe

  • Crispy on the outside and tender inside
  • Full of delicious Indian flavors
  • Easy to make in the Ninja Foodi
  • Uses less oil than deep frying
  • Served with a fresh homemade mint chutney

Crispy Masala Fish in Ninja Food

This Crispy Masala Fish is packed with bold spices and cooked until perfectly golden and crispy. The fish is marinated with aromatic seasonings and served with a fresh and flavorful mint chutney that adds a refreshing touch. This easy recipe is perfect for lunch, dinner, or as an appetizer for gatherings. Made in the Ninja Foodi using the Air Crisp function, it gives you delicious crispy fish with less oil.
Prep Time 15 minutes
Cook Time 20 minutes
marrinate time 2 hours
Total Time 2 hours 45 minutes
Course Main Dish, Side Dish
Cuisine Indian, Pakistani, South Asian
Servings 6

Equipment

  • Ninja Foodi

Ingredients
  

For the Fish

  • 6 fish slices
  • 2 teaspoons cumin dry roasted and crushed
  • 1 tablespoon tandoori masala optional
  • ¼ teaspoon turmeric powder
  • ¼ teaspoon garam masala
  • 1 teaspoon red chili powder
  • 2 tablespoons ginger and garlic paste
  • 3 tbsp oil
  • teaspoons salt
  • 1 –2 tablespoons lemon juice

For the Mint Chutney

  • 1 cup fresh cilantro
  • ½ cup fresh mint leaves or basil leaves
  • ½ teaspoon cumin dry roasted and crushed
  • 3 teaspoons shredded coconut
  • ½ teaspoon salt
  • 2 –3 tablespoons lemon juice
  • ¼ cup water

For Cooking

  • About 2½ cups water
  • Non-stick cooking spray
  • Butter spray

Instructions
 

Marinate the Fish

  • In a bowl, combine cumin, tandoori masala, turmeric powder, garam masala, red chili powder, ginger and garlic paste, oil, salt, and lemon juice.
  • Coat the fish slices with the marinade and refrigerate for at least 2 hours.

Prepare the Mint Chutney

  • To make the mint chutney, blend cilantro, mint leaves or basil, cumin, shredded coconut, salt, lemon juice, and water until smooth.

Prepare the Ninja Foodi for Air Crisping

  • Place the grilling rack inside the inner pot of the Ninja Foodi and pour in about 2½ cups of water.
  • Lightly spray the rack with non-stick spray.
  • Arrange the marinated fish slices on the rack and spray them lightly with butter.

Air Crisp the Fish

  • Select Air Crisp and cook at 200°C (400°F) for 20 minutes, flipping the fish halfway through after 10 minutes.
  • Remove the fish from the Ninja Foodi and serve hot with the mint chutney.

Notes

Marinating the fish for at least 2 hours gives the best flavor.
Tandoori masala is optional but adds extra color and taste.
You can use mint leaves or basil leaves for the chutney.
Serve with lemon wedges and sliced onions for extra freshness.
Keyword Air Fryer Masala Fish, Crispy Masala Fish, Ninja Foodi Crispy Masala Fish

Arborio Rice Pilaf

This Arborio Rice Pilaf is a fragrant and colorful rice dish made with warm spices, sweet carrots, tart cranberries, and crunchy pine nuts. A touch of saffron gives the rice a beautiful golden color and rich flavor.

Perfect for holidays or family dinners, this sweet and savory pilaf pairs wonderfully with grilled meats, curries, and roasted vegetables. It is easy to make and makes an elegant side dish for any occasion.

Why You’ll Love This Recipe

  • Rich and aromatic flavor
  • Sweet and savory combination
  • Beautiful golden color from saffron
  • Perfect for special occasions
  • Easy to prepare with simple ingredients

Fragrant Arborio Rice Recipe with Saffron, Pine Nuts & Cranberries

Arborio Rice Pilaf is an elegant side dish featuring tender rice infused with aromatic spices, saffron, and sweet dried cranberries. Finished with caramelized carrots and toasted pine nuts, this colorful pilaf delivers a delicious balance of sweet and savory flavors. Perfect for holiday meals or everyday dinners, it pairs beautifully with grilled meats, curries, and roasted vegetables.
Prep Time 5 minutes
Cook Time 25 minutes
Total Time 30 minutes
Course Side Dish
Cuisine Middle Eastern, persion inspired
Servings 4

Ingredients
  

  • 3 tablespoons ghee divided
  • 2 tablespoons pine nuts
  • 1 cup grated carrots
  • 1 teaspoon sugar
  • 3 tablespoons dried cranberries
  • 1 star anise
  • 2 green cardamom pods
  • ½- inch cinnamon stick
  • 4 –5 black peppercorns
  • 2 cloves
  • ¼ teaspoon black cumin
  • 1 tablespoon ginger julienne
  • 1 cup Arborio rice
  • 2⅔ cups water
  • 2 –3 tablespoons sugar
  • ¼ teaspoon saffron strands dissolved in 2 tablespoons warm milk

Instructions
 

  • Heat 1 tablespoon ghee in a frying pan. Toast the pine nuts until lightly golden and set aside.
  • Cook the grated carrots until tender. Add 1 teaspoon sugar, then remove and set aside.
  • Fry the cranberries briefly and set aside.
  • In a saucepan, heat the remaining ghee. Add star anise, cardamom, cinnamon, black peppercorns, cloves, black cumin, and ginger. Cook until fragrant.
  • Add the Arborio rice and stir until well coated with ghee.
  • Gradually add the water and cook over low heat, adding the remaining water as needed.
  • Stir in sugar and saffron milk and continue cooking until the rice is tender.
  • Mix in half of the carrots, cranberries, and pine nuts.
  • Cover and simmer for a few more minutes.
  • Garnish with the remaining carrots, cranberries, and pine nuts. Serve hot.

Notes

Add the water gradually for the best texture.
Toast the pine nuts carefully to avoid burning.
Store leftovers in the refrigerator for up to 4 days.
Keyword Arborio Rice Pilaf, Middle Eastern Rice Pilaf, Sweet and Savory Rice Pilaf

Instant Pot Balsamic Chicken

If you want an easy dinner that is full of flavor, this Instant Pot Balsamic Chicken is a great recipe to try. The chicken turns out juicy and tender, while the potatoes and carrots cook perfectly in the same pot. The rich balsamic sauce gives this meal a delicious sweet and tangy taste.

This recipe is simple enough for busy weeknights and special enough for family dinners. Since everything cooks together in the Instant Pot, there is less mess and less time spent in the kitchen.

Why You Will Love This Recipe

  • Easy one-pot meal
  • Tender and juicy chicken every time
  • Full of rich balsamic flavor
  • Potatoes and carrots cook with the chicken
  • Perfect for busy weeknights
  • Simple ingredients and easy steps

Easy Instant Pot Balsamic Chicken Dinner

Instant Pot Balsamic Chicken is a comforting one-pot meal featuring juicy chicken thighs, tender baby potatoes, and sweet carrots simmered in a rich balsamic sauce. The combination of savory seasonings and the sweet-tangy flavor of balsamic vinegar creates a delicious dinner with minimal effort. With everything cooked together in the Instant Pot, this hearty meal is perfect for busy weeknights when you want something satisfying without spending hours in the kitchen.
Prep Time 5 minutes
Cook Time 22 minutes
pressure cook 6 minutes
Total Time 33 minutes
Course Dinner, main course
Cuisine American, Italian-Inspired
Servings 4

Equipment

  • Instant Pot

Ingredients
  

Chicken

  • 8 chicken thighs 2 pounds/900 g
  • 1 teaspoon salt
  • 1 teaspoon paprika
  • 1 teaspoon garlic powder
  • 1 teaspoon Italian seasoning
  • ½ teaspoon black pepper
  • 1 tablespoon olive oil

Sauce

  • 2 tablespoons ghee
  • ¼ cup balsamic vinegar
  • 1 garlic clove chopped
  • ½ cup chicken broth

Vegetables

  • 1 pound baby potatoes quartered
  • 1 pound carrots cut into pieces
  • 1 tablespoon olive oil
  • 1 teaspoon Italian seasoning
  • 1 teaspoon garlic powder
  • 1 teaspoon salt
  • ½ teaspoon black pepper

Garnish

  • Fresh parsley

Instructions
 

  • Season the chicken thighs with salt, paprika, garlic powder, Italian seasoning, and black pepper.
  • Turn on sauté mode and heat olive oil. Cook the chicken for 5 to 6 minutes per side. Remove and set aside.
  • Add ghee, balsamic vinegar, and chopped garlic. Cook for 1 minute.
  • Pour in chicken broth and deglaze the pot. Simmer for 1 minute.
  • Mix potatoes and carrots with olive oil, Italian seasoning, garlic powder, salt, and black pepper.
  • Add the vegetables to the Instant Pot and place the chicken on top.
  • Close the lid and pressure cook on High Pressure for 6 minutes.
  • Perform a quick release.
  • Garnish with fresh parsley and serve.

Notes

  1. Deglaze the pot well to avoid the burn notice.
  2. Chicken thighs provide the best flavor and tenderness.
  3. Store leftovers in the refrigerator for up to 4 days.
Keyword Instant Pot Balsamic Chicken, Instant Pot Chicken Thighs, One-Pot Chicken Dinner

Tomato Chutney – Tangy, Spicy & Flavor-Packed Homemade Condiment

This homemade Tomato Chutney is a simple yet incredibly flavorful condiment made with ripe tomatoes, mustard oil, garlic, and a fragrant blend of traditional tarka spices. Cooked until rich and thick, it delivers the perfect balance of tanginess, warmth, and spice in every bite.

What makes this chutney special is the combination of aromatic whole spices, curry leaves, and garlic tempered in mustard oil, which gives it a distinctive depth of flavor. The tomatoes are first pressure cooked in Ninja Foodi and strained to create a smooth texture, then cooked down through a proper bhunai process until the oil separates, resulting in a chutney that is both rich and intensely satisfying.

Whether served alongside chapati, paratha, rice dishes, or simply spread over a slice of bread, this versatile tomato chutney adds a burst of flavor to any meal. It’s an easy recipe that transforms everyday ingredients into a delicious accompaniment you’ll want to keep on hand.

Tomato Chutney – Tangy, Spicy & Flavor-Packed Homemade Condiment

A flavorful homemade tomato chutney prepared with mustard oil, garlic, traditional tarka spices, and a touch of lemon juice. Perfect with chapati, paratha, rice, or as a spread on bread.
Prep Time 10 minutes
pressure cooker time 20 minutes
Total Time 30 minutes
Course Side Dish
Cuisine Pakistani
Servings 12

Equipment

  • Ninja Foodi

Ingredients
  

For the Chutney Base

  • 1500 g tomatoes
  • 1 tsp red chili powder
  • 1 tsp salt
  • 135 g tomato paste
  • 2 tbsp lemon juice optional

For the Tarka

  • 1/2 cup mustard oil
  • 1 garlic clove for neutralizing oil smell
  • 1/2 tsp cumin seeds
  • 1/2 tsp fenugreek seeds
  • 1/2 tsp nigella seeds
  • 1/2 tsp mustard seeds
  • 5-6 garlic cloves thinly sliced
  • 15-20 curry leaves
  • 5-6 dried whole round red chilies
  • 4-5 garlic cloves

Instructions
 

Pressure Cook

  • Pressure cook tomatoes and 4-5 garlic cloves on high for 20 minutes. Do not add water; the tomatoes will release their own moisture.
  • Pressure Cook at High for 20 minutes and release the pressure Naturally
  • Allow the tomatoes to cool slightly, then remove and discard the skins.
  • Strain the cooked tomatoes and reserve the liquid. The liquid is not needed for this recipe. You should get approximately 3 cups, which can be used for cooking rice or pasta.
  • Pressure Cook on High for 20 minutes then release the pressure Naturally

For the Tarka

  • Heat mustard oil in a pan. Add 1 whole garlic clove and let it sizzle. This helps neutralize the strong smell of mustard oil and indicates the oil is ready for the tarka spices.
  • Remove the whole garlic clove. Add the thinly sliced garlic and fry while stirring constantly until fragrant and lightly golden.
  • Add cumin seeds, fenugreek seeds, nigella seeds, mustard seeds, curry leaves, and dried whole red chilies. Stir continuously until aromatic. Do not burn the spices. Remove the tarka from the pan immediately to stop further cooking.

Preparing the Base for the Chutney :

  • Add the tomatoes and whole garlic cloves to the Ninja Foodi inner pot
  • No water needed tomatoes will release their own moisture, close the pressure lid and pressure cook until softened.
  • Add the strained tomato pulp, tomato paste, lemon juice (if using), and the prepared tarka oil. Mix well.
  • Mash any remaining tomato chunks while frying.
  • Add salt and red chili powder. Continue frying (bhunai) until the oil separates from the chutney.
  • Serve warm or at room temperature.

Notes

Serve this tomato chutney as a spread, or condiment alongside parathas, chapati, dosa, idli, grilled meats, sandwiches, or rice dishes. It can also be used as a flavorful accompaniment to breakfast items.
Don’t discard the strained tomato liquid. Reserve it and use it to cook rice, pasta, soups, or curries for extra flavor.
Remove the tomato skins for a smoother chutney texture.
 
Keyword chatni, Instant Pot Tomato Chutney, Ninja Foodi Tomato Chutney, raita, tomato chatni

Talbina – Nourishing Barley & Dates Porridge


Talbina has long been appreciated across many Eastern, and Middle Eastern traditions for it’s warmth, simplicity, and comforting texture.

Made from barley and gently sweetened with dates, it is often enjoyed as a nourishing breakfast or a soothing evening meal.


Its smooth and creamy consistency makes it deeply comforting, while the natural sweetness of dates adds richness without overpowering the gentle flavor of the barley. Served warm talbina feels wholesome, calming, and satisfying in a way that simple traditional foods often do best.

In Many Muslim homes, talbina is also appreciated for its special place in Prophetic tradition, where barley -based foods have long been associated with comfort, nourishment, and ease. Recipes like this continue to remain timeless because they are built around simplicity, balance, and gentle nourishment rather than heaviness or excess.

Whether enjoyed as part of a slow morning routine or as a comforting bowl at the end of the day, talbina remains one of those traditional dishes that beautifully connects nourishment, warmth, and mindful eating.


Talbina – Nourishing Barley & Dates Porridge

Talbina is a traditional barley preparation that has long been valued for its comforting and nourishing qualities. It is also mentioned in authentic Islamic traditions and was recommended by Prophet Muhammad ﷺ as a soothing food during times of sadness and grief.
Prep Time 5 minutes
Cook Time 20 minutes
Total Time 25 minutes
Course Breakfast
Cuisine Middle Eastern-Desi Fusion
Servings 4

Ingredients
  

  • 1/3 Cup Ghee
  • 1 Cup Dates Chopped Dates 1 cup or 7 large dates
  • 1/2 Cup Barley flour
  • 4 Cups Milk

Instructions
 

  • Add Ghee to the pan
  • Add Dates
  • Fry until Dates soften and release aroma
  • Add barley flour
  • Fry until color slightly changes and becomes aromatic
  • Add milk
  • Stir constantly to avoid lumps and cook until you get your desired consistency.
  • Serving Suggestion: Sprinkle some roasted chopped nuts, drizzle some honey, and enjoy hot or chilled.
Keyword barley milk porridge, barley porridge, comforting breakfast, creamy barley porridge, desi wellness recipe, easy talbina recipe, healthy barley drink, healthy comfort food, healthy homemade drink, islamic traditional food, Meaningful Masala recipes, middle eastern breakfast, nourishing breakfast recipe, prophetic food, soothing barley recipe, sunnah food, talbina, talbina recipe, warm wellness drink, wholesome breakfast

Ginger Health Benefits and Why It Has Been Used for Generations

Ginger has been used in cooking and traditional home remedies for centuries because of both its strong flavor and the wide range of benefits commonly associated with it. Found in teas, soups, curries, herbal drinks, marinades, and natural remedy mixtures, ginger continues to remain one of the most widely used ingredients in kitchens around the world.

One of the best known compounds in ginger is gingerol, which contributes to its distinctive spicy flavor as well as many of its traditionally discussed health-supporting properties. Ginger is especially popular during colder seasons because of its warming effect and the comforting sensation it provides in drinks and broths.

Ginger is commonly associated with digestive support and is frequently consumed after heavy meals because many people find it soothing for bloating, stomach discomfort, and feelings of heaviness. Ginger tea is also widely used in many households because it is often discussed in relation to nausea and motion discomfort.

Another reason ginger remains highly valued is its connection to immune-supporting and seasonal wellness routines. Homemade drinks combining ginger with honey, lemon, or black pepper are commonly prepared during weather changes and colder months because these ingredients are traditionally associated with warmth and comfort.

Ginger is also frequently discussed for its antioxidant and anti-inflammatory properties. This is one reason it continues to appear in many wellness-focused diets and homemade health drinks. In traditional food practices, ginger is often appreciated not only for taste but also because it helps meals feel lighter, warmer, and easier to digest.

In cooking, ginger does far more than simply add spice. It reduces strong odors in meat and seafood, balances richness in creamy or fatty dishes, brightens soups and broths, and adds freshness to marinades and sauces. Ginger and garlic together are used as the foundation of many savory dishes because they quickly create aroma and depth during cooking.

Fresh ginger is also extremely versatile. It can be sliced into tea, blended into sauces, grated into stir-fries, cooked into desserts, added to rice dishes, or paired with honey in simple homemade mixtures. Recipes such as ginger honey blends, mutton yakhni, spicy pepper beef karahi, and masala teas all show how ginger can move easily between nourishing drinks and deeply savory meals.

Even today, despite modern supplements and processed wellness products, ginger continues to remain one of the most trusted ingredients in traditional kitchens because it combines flavor, practicality, and widely appreciated health-supporting qualities in one simple root.

Ginger Health Benefits and Why It Has Been Used for Generations

Privacy Overview

This website uses cookies to provide you with the best possible user experience. Cookie information is stored by your browser and performs functions such as recognizing you when you return to our website, as well as helping our team understand which parts of the website are most interesting and useful to you.